For perfect mouldings, you must start with perfect grinding templates.
800-759-6268
516-595-7495
![]()
For perfect mouldings, you must start with perfect grinding templates.
Phone: 1-800-759-6268
Technical Support
Technical Support
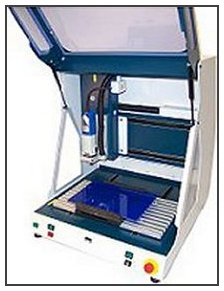
A0812
A0812B
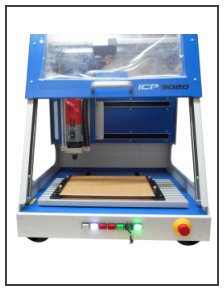
A1215
Error Code 2 on Software
- Open the door of the machine.
- Press red E-Stop on front of machine. Machine will switch off.
- Manually pull the left/right axis to the middle of the travel.
- Manually pull the up/down axis down about .5″
- Finally push the table to the middle of the travel (this will be hard to push or pull)
- Twist E-Stop clockwise and press the green POWER button to restart machine.
- Close the door.
- Re-enter the AutoTEMP.
- Click the HOME button at the top of the screen.
- Now you can try to cut your template again.
- If you immediately get an error code 2 again when you try to cut a template, it is possible that the origin needs to be reset. Follow the instructions for resetting the origin.
- If you prefer that we help you with the technical support, please call 828-431-2205 for support options.
I/O Error 103 – How to Close Multiple Copies of the Program
- If you receive an I/O error 103, it typically means the computer was trying to send commands to the machine, this process was interrupted, and then another copy of the program was opened causing the input/output error 103.
- The easiest (and slowest) fix for this is to shutdown and restart the computer.
- The quickest way to fix this issue is to do an ALT/CTRL/DELETE on your computer, go into the TASK MANAGER and end the task for AutoTEMP. You may have to click END NOW twice. Then exit task manager.
- Once the program is fully closed or the computer has been restarted, try starting AutoTEMP and see if you can get the machine to run your template.
- Note: Typically, we see an I/O 103 error when the machine has been stopped because of another reason and the customer tries to run the program a second time. This means you may still have the original issue that caused the machine to not work in the first place.
- If this did not fix your issue, please call 828-431-2205 and we can assist you further with a paid support option.
How to Reset the Origin
Setting the origin on the machine depends upon the machine type, the clamping system used and the options on the machine.
First go to Setup – Set Origin – (make sure the machine is on and the door is closed) – Answer YES to HOME machine.
The machine control will be on the screen.
Look at the photos of the clamp styles below to determine the applicable clamping system and then go to the correct section on the page to follow the instructions.
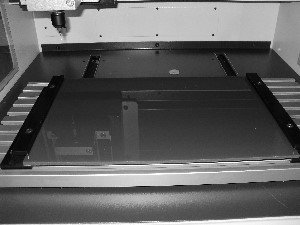
Clamp Style A
Clamp Style B

Clamp Style C
Model A0812 and A0812B Clamp Style A
(bars down the left and right side of the plastic)
NOTE – If at any time in this process you encounter a Machine Error – Code 2, go back to the previous section and follow the instructions (Machine Error – Error Code 2).
On the machine control – change the jog distance to .1 inch.
On the machine control – Click the RIGHT button 1 time.
Click the BACK button 7 times.
Change the jog distance to 1 Inch.
Click the BACK button 6 times.
Change the jog distance to .1 Inch.
NOTE – Be careful with the next move. You could break the bit.
Jog DOWN until you are 1/8” above the plastic (you can change to 0.05 for finer adjustment).
(if you open the cover on the machine – it must be closed before you can continue).
Looking through the front of the machine, the bit should be approx. 1/8”- 1/4″ to the right if the clamp bar, 1/8” above the plastic.
If this is Correct – Click SET ORIGIN, Enter the password CNC123 (make sure the CNC is uppercase).
Model A0812 and A0812B Clamp Style B
(bars across the front and back of the plastic)
NOTE – If at any time in this process you encounter a Machine Error – Code 2, go back to the previous section and follow the instructions (Machine Error – Error Code 2).
On the machine control – change the jog distance to .1 Inch.
On the machine control – Click the RIGHT button 1 time.
Click the BACK button 5 times.
Change the jog distance to 1 Inch.
Click the BACK button 7 times.
Change the jog distance to .1 Inch.
NOTE – Be careful with the next move. You could break the bit.
Jog DOWN until you are 1/8” above the plastic (you can change to 0.05 for finer adjustment).
(If you opened the cover on the machine – it must be closed before you can continue).
Looking through the side of the machine the bit should be approx. 1/8-1/4” away from the clamp bar 1/8” above the plastic.
If this is Correct – Click SET ORIGIN, Enter the password CNC123 (make sure the CNC is uppercase).
Telephone Technical Support at 828-431-2205
Contact Information:
Isel USA
Toll Free: 800-759-6268
Office: 516-595-7495
Email: sales@templatemakers.com
Address: 69 Bloomingdale Rd
Hicksville, NY 11801